Monday, 10 March 2014

6th Model - Multi Gym

Firstly I started with the handlebar of the equipment I went on the free hand spline. I then sorted the points out so that they were straight on the 2D front image. I then went back on perceptive and use the soft interpolation, which is found on structure and then edit spline. I then got a circle off the free hand spline and placed a loft nurb onto it to create the bars. I then got a cylinder from from the cube object and and scaled it down to size X=52, Y=94 and Z=51. 

To do this part is quite tricky because there was some small pieces but it's fairly simple to do. Firstly I got a cylinder and made it editable. I then scaled it down to X=5,Y=481 and Z=5. After I did the first cylinder I then copied and pasted it and dragged it along the X axis. I then did the same again and a again to make it look something like this. To get the black circles I got another cylinder and and made it editable and scaled it down to X=63.5,Y=26.5 and Z=54. And like the other I copied and pasted them and put them into place. 

This is the first part of the multi gym. I did this part of the gym by copy and paste the first cylinder in the first image. I then got a cube from the cube object and made it editable. I then scaled it down toX=41.5,Y=35,Z=258.

To do the bench I got a cube from the cube object and fillet it in the attributes. I then made the shape editable and scaled the object down to X=168,Y=41.5 and Z=235. I then copied and pasted this and rotated the shape 90 degrees and scaled it to X=164,Y=44 and Z=405.5. To do the handles I simply copied and pasted the ones I did before and rotated the 90 degrees. 
To do the weights I stared off with a cube form the cube object and did a fillet in attributes. I then made the shape editable and scaled it down to X=110, Y=44 and Z=245.5. After I did this shape I then copied and pasted it 4 times and placed them one on top of each other by moving them on the Y axis. I then went onto the cube object and selected a cylinder and made that editable an scaled that down to X=68, Y=116.5 andZ=54 I then placed this on top of the weights for it to be a basis. To make the strings that pull the weight up I simply got a cylinder from the cube object and made it editable and scaled it down X=8, Y=631 and Z=8. I then copied and pasted them to make 3 to hold the weights together.
To do the press bar I firstly made a cube and made it editable and scaled it to X= 301,Y=152.5 and Z=22. I then made the bars to use as a base I again, got a cube from the cube object and made it editable I again scaled it down X=38 Y=33,and Z=639. and copied and pasted 4 of them and rotated them and placed them in the right position. 


This is the final piece of the multi gym. I am really pleased at how I did this I think its one of my better models. because I have gotten use to the software more.

5th model - File

To start my paper file I used the basis and did the holder which will hold the second file up. To do the holder I went on the cube object and clicked on cylinder and made it editable. To get the size of the shape the coordinates were X=5 ,Y=73 and Z=5. I then copied and pasted another 3 of them and put them into place.

To make the box I got a cube from the cube object and made it editable. I then scaled it  down to size with X=200,Y=66 and Z=287.5. To get the edge of the shape thicker I selected all the edges and scaled them to get that thickness. I then went onto the polygon tool and selected the top face and the front face and deleted them. I then went on materials and went on the red plastic and reduced the reflection of the colour so it looked more solid.

As you can see in this photo I have  added the objects which I have  created and placed them in the right places I then grouped the objects together so that they stayed in the same place.
After I grouped the objects, I selected the red tray, and copied and pasted it and used the Y axis to move the tray up so that it  rests onto the poles that I created at the start. To make the paper for the files I got a cube object from the tool bar and made it editable. I then scaled it down X=243 ,Y=1.6 and Z=174. I then went on materials and got a image of lined paper off the internet and went to colour and headed down to texture and uploaded the image I then placed the image onto the cube and copied and pasted it to make paper.


4th Model - Rowing Machine

Firstly I started off with a cylinder which I got off the cube object. I then made the cylinder editable so that I could scale it down to the size I wanted it to be which was X=32, Y=149 and Z=32. To get the side bigger what I did was copied a pasted the cylinder and scaled it down to X=34.5 ,Y=13 and Z=34.5. I then copied a pasted this cylinder and placed them on either end of the first cylinder.


I then hid the cylinders. I went on side view and used the bezier tool which is on the freehand spline tool. I firstly roughly drawn out the shape which would look like a rowing machine. I used 4 points for this shape. After I did a rough drawing of the base of the rowing machine, I then got a circle from the freehand spline tool and placed it to were the curve is on the shape. I then put the snaps on for the points and moved the round the circle to make the round curve. I then deleted the circle and got a base shape like this.


I then went back to the perceptive and clicked onto the spline. I then went onto the hypernurb object and clicked on the extrude nurb. What the extrude nurb does is it makes the 2D shape what you made into a 3d object. After I extruded the shape I then scaled it to the size I wanted it X= 56.5, Y=314.5, and Z= 423. I then went on the side and made my cylinders re-appear and put them in the right position.  I then grouped them all together.


After I did the base of the  rowing machine, I then added a segment on the top. I then got the polygon tool and selected one of the faces in the middle on the top. Then I clicked on structure and  bevel extruded tool and extruded it slightly, then I beveled it again and angled it. To make the foot pedals I used a cube  and fillet it to make it smooth and used segments X=3,Y=1 and Z=3.I then made the shape editable and scaled it down to size; X=37, Y=80 and Z=49. And rotated it sightly P=-25. To get the strap for the foot, I went on the polygon tool and clicked on the two end faces in the middle. I then went on structure and extruded the two faces together 3 cm. I clicked on the tops of the extrude faces and went on structure and clicked on bridge. I then went on materials and clicked on a black matt and copied and pasted the foot pedal to make another one for the other side.
To make the seat I went on the right side view and clicked on the freehand spline and clicked on bezier. Making the shape was quite tricky to do. When I was happy with my shape, I went back on the perceptive extruded the shape, like I did with the base of the rowing machine. To get the length of the bar I simply got a cube and made it editable and scaled it down to X=26, Y=26 and Z=726. I then copied the bar which I just created and scaled it down again to make the end stopper as you can see in the photo. I scaled it down X=27.5, Y=31, and Z=15. To make the base of what the seat sits on, I copied and pasted the end stopper and scaled to make it bigger, X=40, Y=33 and Z=60. To get the hole to make the seat move, I went on the polygon tool and selected the end faces and deleted them and grouped the seat and the holder together. To make the base to what it holds I copied and pasted the one I did before for the base of the rowing machine.

To make the screen I simply  went on the cube object and scaled it to size X=67, Y=84.5 and Z=11, I then placed it onto the extruded part which we did before. I then got a image off the internet of a screen on an exercise machine and went on materials on cinema 4D. I then clicked on colour and went to texture and opened the picture I selected. I then placed the image onto the square.

3rd model - Water Cooler

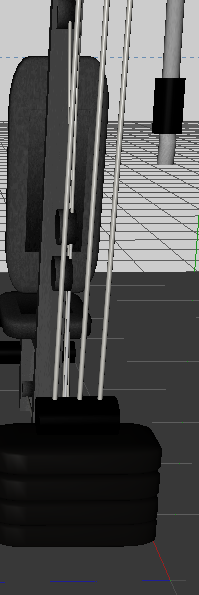
Firstly I got a cylinder from the cube object tool, I then made the object editable, I then clicked on the scale tool to x=150, y=223,z=160. I then had to smoothen the top and bottom faces. I did this by going onto structure and clicking on edit spline and going on soft interpolation. To get the rings in the water cooler, I clicked on faces and clicked on the middle face, i then grabbed the knife tool which is in structure, and knifed two parts of the water cooler. I then did the same again underneath, then again at the bottom as you can see in the photo. After I did this I extruded the shape by going onto structure. I extruded it in to create the water cooler effect. To get the blue effect I went on materials and clicked on the blue plastic and lowered the reflection.


To get the base of the water cooler I had to get a cube from the object tool, and put 4 segments into the x axis and 4 for the Y axis. I then went on the polygon tool and clicked on the four faces in the middle on the front of the cube. I then went on the structure on the bar tool and went on extrude. I then extruded the faces in to make the inside of the water cooler for the taps. I then placed the water cooler which I did      . To make it come together.

How I did the taps were quite simple. I firstly got a cylinder from the cube object and added segments having 8 segments on the x axis and 3 on the y axis. I then scaled it down to x=16, y=31.5, z=22. I went on the polygon tool and selected the 2 faces at the bottom. I then went on structure and extruded the bottom 2 cm. I then copied and pasted the tap and went on the materials and went on red plastic and blue plastic and made the colour solid.

2nd model Running Matchine

I started off by getting a cube from the shape tool and making it into editable. I  scaled the cube to make it into a rectangle to make it the base of the treadmill. I went on the face selection tool and selected the outer faces as you can see on the picture I am selecting the faces. once I selected the face I then went on structure and extruded it. I rendered it to make sure it looked right.


After I did the extruding on the base of the treadmill,I grabbed the back four faces with he face tool and extruded them to 30 and scaled them to size, after that I use the Z axis to rotate it 50 degrees. I then did this for the other size as well to make them even. To get the middle bit I grabbed the faces with the face tool and extruded it up and used the z axis to give it the angle. I made it level with the two sides.
Firstly get a cube and make it fillet by going on attributes and clicking on it this smooths the edges of the cube. Then I scaled it down to size by making it editable I used the face tool for on of the side faces and clicked and extruded it to the size that goes with the treadmill.
After I did the handles I grabbed the face on top and extruded it 20cm and but an angle on it to make it look like a screen because this just as a square didn't look right.


To make the face of the screen I used another cube and put a fillet on it to give the cube smooth edges like a screen. I then had to scale it down and rotate it to give it that shape.To make the button for underneath the screen I used a cylinder and scaled it down dramatically so that they will fit under the screen.
This is my final piece of my running treadmill. I added some materials to make it come to life a bit. I used a dark grey matt for the structure of the treadmill. I got these from the content browser tool on the bar. I then used the same matt but turned it black for the belt, screen and buttons.


Monday, 10 February 2014

Cinema 4D - Activity 1 Holes


 Firstly I got a cogwheel out of the free hand spline tool and then got a circle and scaled it so that the circle was smaller than the cogwheel. I then made the spline editable by going on the object menu.


I then created a extrude NURBS object, and dropped in both  splines to get an extrude of that shape. I then connected the two spline and dropped the new connected outlines to the Nurbs object . It then makes a hole.
This is what the final piece of the hole cogwheel looks like. As you can see there is a hole in the centre of the object.

Cinema 4D activity 2 Holes

 I started off by getting a sphere from objects and also getting a cube. This part was easy. 
I then make a Boolean object from the add array object menu and inserted both the sphere and cube into it. I changed the Boolean type to A - B. What this does is it will take the cube away from the sphere and make a hole into the object.
This is what the finished but looked like.  This is normally used for making shapes more complicated, or for when shapes need uneven surfaces like for instance you could use this method for using cheese.